How to build a DIY side table

Design your perfect project in 3D with MakeByMe
Try it in your virtual home using HomeByMe
Use MakeByMe plans to turn your design into reality
Description
This simple 2-shelf side table is perfect for next to the couch to set your drinks or a lamp. But it also makes an excellent plant stand with two levels to display from. Beginner level assembly makes this a great weekend project and you can make your shelves either square or round to fit your space and style.
For more ideas you can also browse the Community Content to inspire your next DIY project.

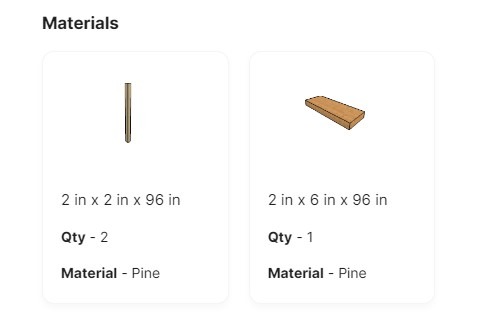
Materials List
- (1) 2x6x8 board
- (2) 2x2x8 boards
- 2 ½” pocket hole screws
- 2 ½” wood screws
- Wood Glue
Tools List
- Miter Saw
- Jig Saw (optional)
- Circular Saw (optional)
- Drill/Driver
- Pocket Hole Jig
- Clamps
Cut List
- 2×2 boards
- (4) 26” long
- (2) 15” long
- (4) 6 ¾” long
- 2×6 boards
- (6) 14 ¾” long
Step 1: Assemble Partial X Brace
Cut one 15” long 2×2 and one 6 ¾” long 2×2. Drill 1 ½” pocket holes into the ends of both pieces.
TIP: Using two pocket holes on each end of such narrow boards can tend to split the wood easily. I personally prefer to use one pocket hole per joint in 2×2 boards, but plenty of glue.
Secure the short 2×2 to the longer 2×2 using wood glue and 2 ½” pocket hole screws, making sure it’s centered side to side.

Step 2: Complete X Brace
Cut another 6 ¾” long 2×2 piece and drill 1 ½” pocket holes into the ends of it. Attach like step 1 using wood glue and 2 ½” pocket hole screws, but on the opposite side so that it forms an X.

Step 3: Assemble Second X Brace
Repeat steps 1 & 2 to create a second identical X brace. One will be for the top and one for the bottom of the table frame.

Step 4: Add Table Leg
Cut one 26” long 2×2 for one of the table legs. Use wood glue and 2 ½” wood screws to secure one “branch” of both X braces to the leg about 2” down from the top and 2” up from the bottom. The 2” dimension is customizable, so if you’d prefer your bottom or top shelf higher or lower, feel free to adjust, but stay consistent on each leg in the next steps.
TIP: Face pocket holes on X braces UP and they’ll be hidden by the shelves/tops when you add them later.

Step 5: Add Second Table Leg
Cut another 26” long 2×2 table leg and secure it opposite the leg from step 4 using wood glue and 2 ½” pocket hole screws. Make sure to keep the locations consistent on each leg—if you installed the Xs 2” from the ends on the first one, make sure it’s 2” from the ends on this one as well.

Step 6: Add Third Leg
Repeat step 5 to add a third leg on to the X braces.

Step 7: Complete Table Frame
Repeat step 6 to secure the fourth leg to the table frame.

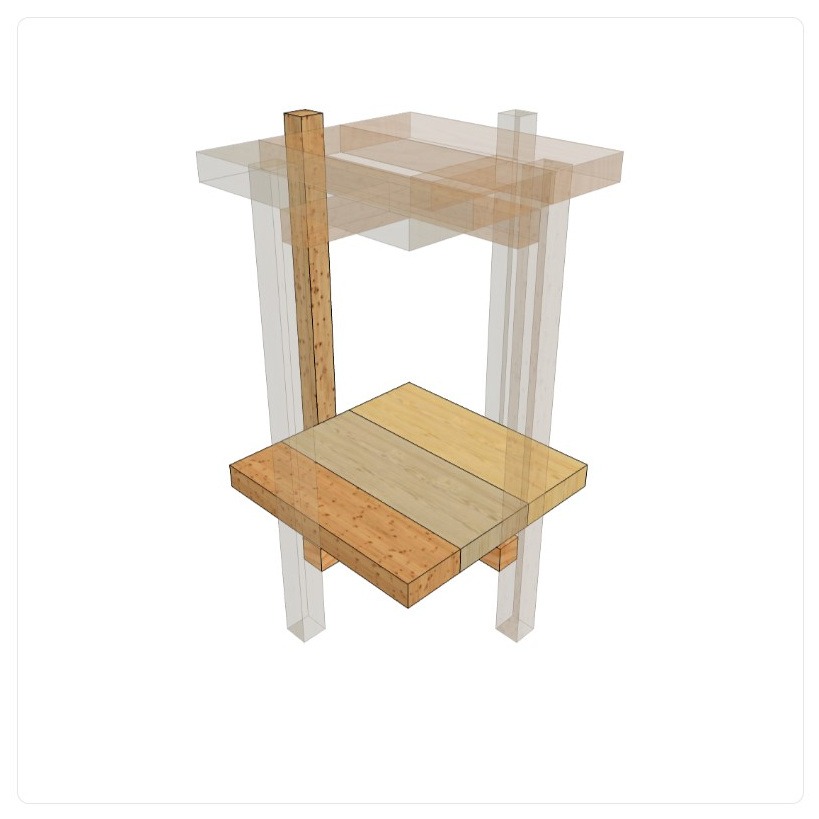
Step 8: Install Table Top
Cut three pieces of 2×6 to about 14 ¾” long (or slightly longer). Edge glue these pieces into a solid panel. Once the glue dries, trim to final size of 14 ¾” square.
OR, if you’d prefer, use a jig saw to cut a 14 ¾” diameter circle from this panel.
Use 2 ½” wood screws through the underside of the top X brace to secure this panel in place leaving about 1/8” gap between it and each leg.
TIP: To allow for wood movement, drill oversized holes through the X brace and use washer head screws or add a washer to the screw before driving to allow the top to expand and contract seasonally without putting stress on the frame underneath.

Step 9: Add Bottom Shelf
Repeat step 8 to install an identical shelf panel onto the bottom X brace to complete the table.
Finished Product
Leave it with a natural finish or apply some stain or paint to complement the decor in your room.
To help you decide why not create a few styles in MakeByMe and visualise them in your home using HomeByMe.

Use MakeByMe to design and build the perfect project for your home.
Design your perfect project in 3D with MakeByMe
Try it in your virtual home using HomeByMe
Use MakeByMe plans to turn your design into reality
Get Started!
