DIY Plans to build a rotating bookshelf

DESIGN your perfect project in 3D with MakeByMe
Try it in your VIRTUAL home using HomeByMe
Use MakeByMe plans to MAKE your design a reality
Perfect for a home office, kids room, even a kitchen. Make a rotating bookshelf for a stylish and unique item for your home.
Description:
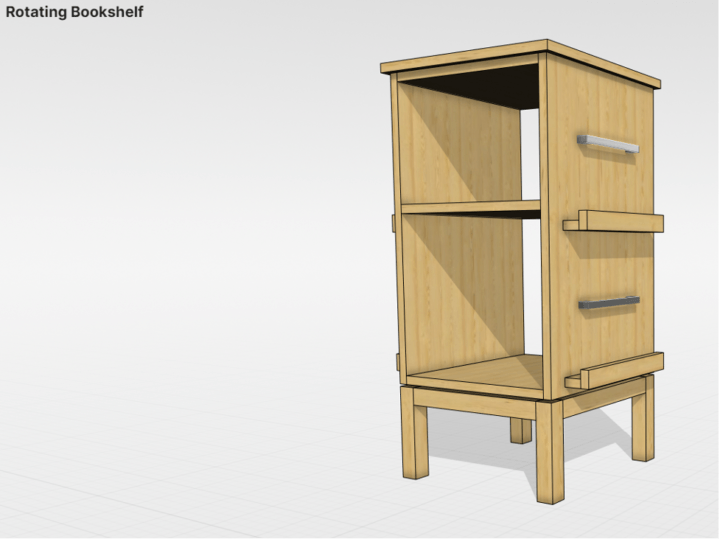
This rotating bookcase is perfect for any room in your home. The top section is attached to the base with Lazy Susan hardware allowing it to spin and access all four sides. With ledges on the sides for magazines or larger books, and plenty of storage in the middle for books of all sizes, this is a unique take on the average bookshelf.
Materials List:
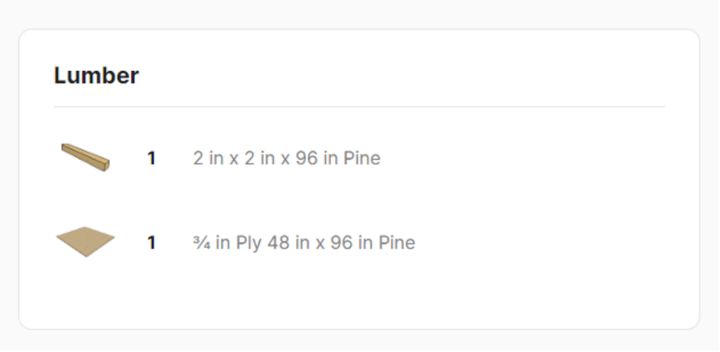
- (1) 2x2x8 board
- (1) 4×8 sheet ¾” plywood
- (4) 12” drawer pulls
- 1 ¼” and 2” wood screws
- 1 ¼” pocket hole screws
- Wood Glue
- 1 ¼” brad nails
Tools List:
- Miter Saw
- Circular Saw & Straight Edge Guides (for cutting plywood)
- Drill/Driver
- Brad Nailer
- Pocket Hole Jig
Cut List:
- 2×2 boards
- (4) 8” long
- (4) 13” long
- ¾” plywood
- (2) 16” x 26”
- (2) 14 ½” x 16”
- (1) 17” x 17”
- (1) 14 ½” x 16”
- (1) 13” x 13”

Step 1: Assemble Bookshelf Box
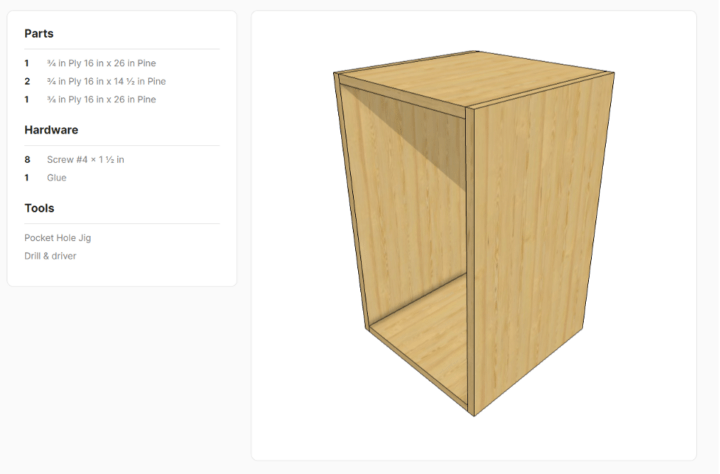
Cut two pieces of 3/4″ plywood to 16″ x 26″ and two more pieces to 14 1/2″ x 16″. Drill 3/4″ pocket holes into the ends of the smaller pieces and assemble a basic cabinet box like shown using 1 1/4″ pocket hole screws.
Place the pocket holes toward the outside of the box so they’ll be hidden in the finished project.
The overall dimensions of this box should be 16″ x 16″ x 26″ tall.
Step 2: Attach Top
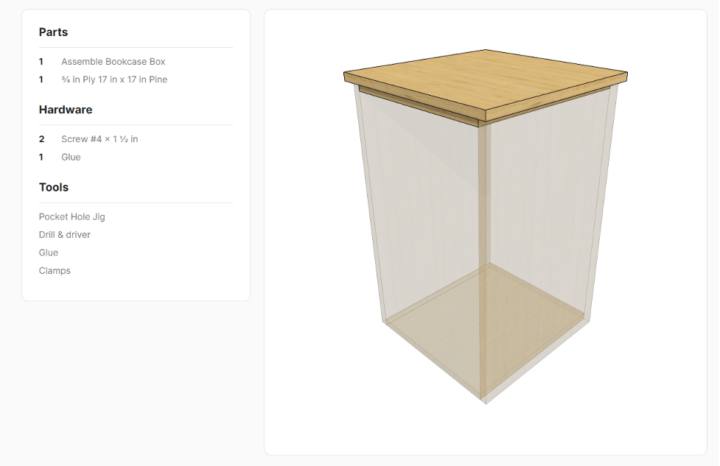
Cut a piece of 3/4″ plywood to 17″ square. Use wood glue and 1 1/4″ screws (through the bottom side) to attach this panel to the top of the box from step 1. Make sure the top is centered on the box–there should be 1/2″ overhang on all sides.
Step 3: Add Bookshelf Ledges
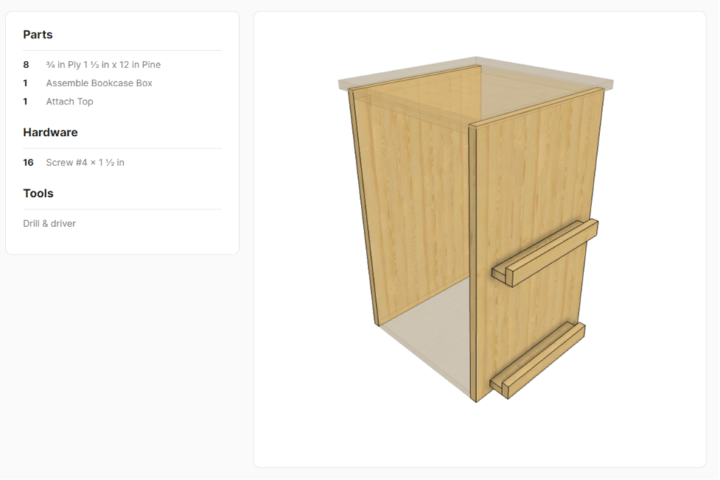
Cut 8 pieces of plywood (or 1×2) to 1 1/2″ x 12″. Assemble 4 identical “ledges” by gluing and brad nailing them into pairs so that one piece runs along the front of the other piece.
Use wood glue and 2″ wood screws (through the inside) to attach the ledges to the sides of the bookcase. Attach two on each side, spacing as desired–one toward the bottom and one toward the middle.
Once the ledges are installed, add 12″ long drawer pull hardware about 6″ up from each ledge. These will help prevent books placed on each ledge from tipping over.
Step 4: Add Middle Shelf
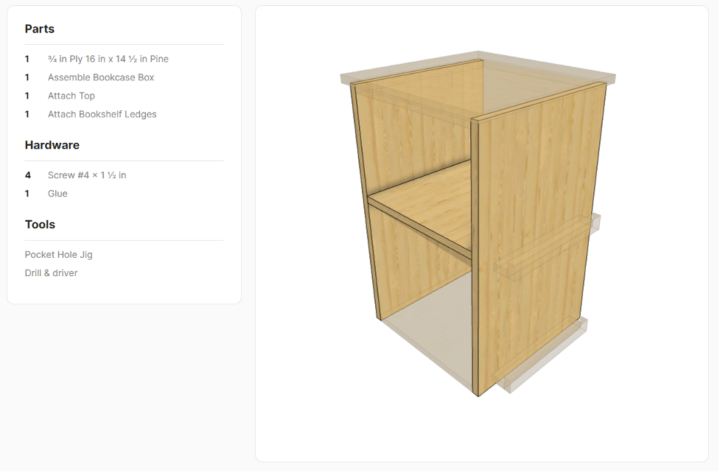
Cut a piece of 3/4″ plywood to 14 1/2″ x 16″ and drill 3/4″ pocket holes along the 16″ long sides.
Install into the bookshelf case like shown using 1 1/4″ pocket hole screws so that the bottom section is 13″ tall.
Step 5: Attach Base
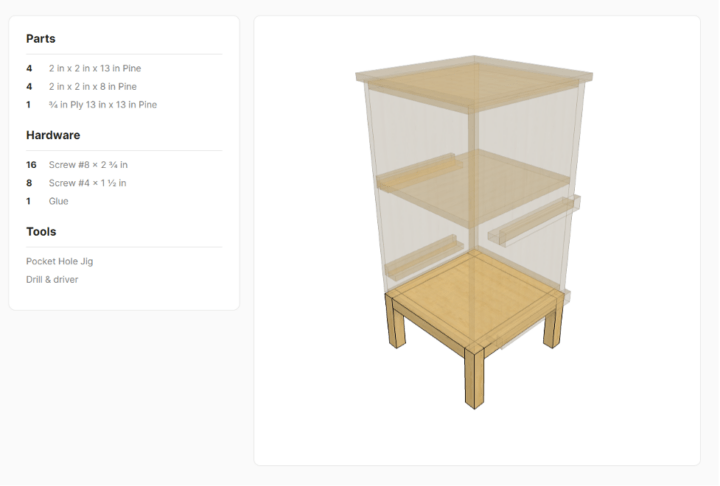
Cut four 8″ long 2x2s for the legs and four 13″ long 2x2s for the base frame. Drill 1 1/2″ pocket holes into the ends of each 13″ long piece and attach between the legs using wood glue and 2 1/2″ pocket hole screws.
Cut a piece of 3/4″ plywood to 13″ square and drill 3/4″ pocket holes along the edges. Install into the frame flush along the top using 1 1/4″ pocket hole screws.
Finish bookshelf and base separately as desired before attaching together.
Attach the base to the bookshelf box using 12″ diameter lazy Susan hardware: First attach the lazy Susan to the base in the center. Drill access holes as needed into the base to allow you to install the other side to the center of the bookshelf bottom.
Use MakeByMe to DESIGN and MAKE the perfect DIY project for your home.
DESIGN your perfect project in 3D with MakeByMe
Try it in your VIRTUAL home using HomeByMe
Use MakeByMe plans to MAKE your design a reality
Get Started!
